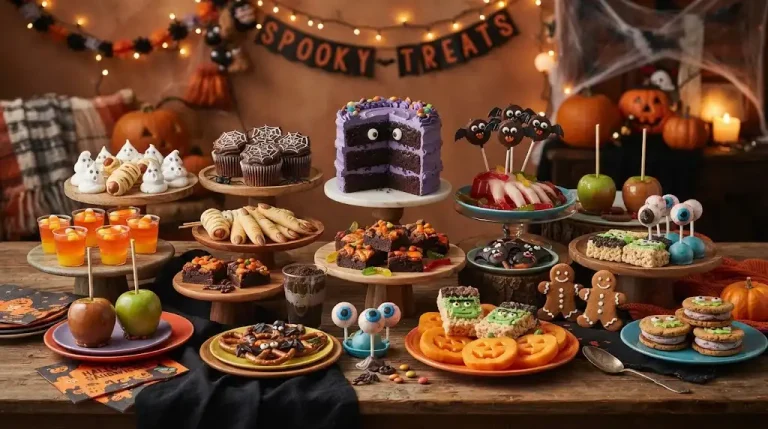

15 Easy Halloween Treats That Will Make Your Party Extra Spooky
Monster Eye Chocolate Chip Cookies
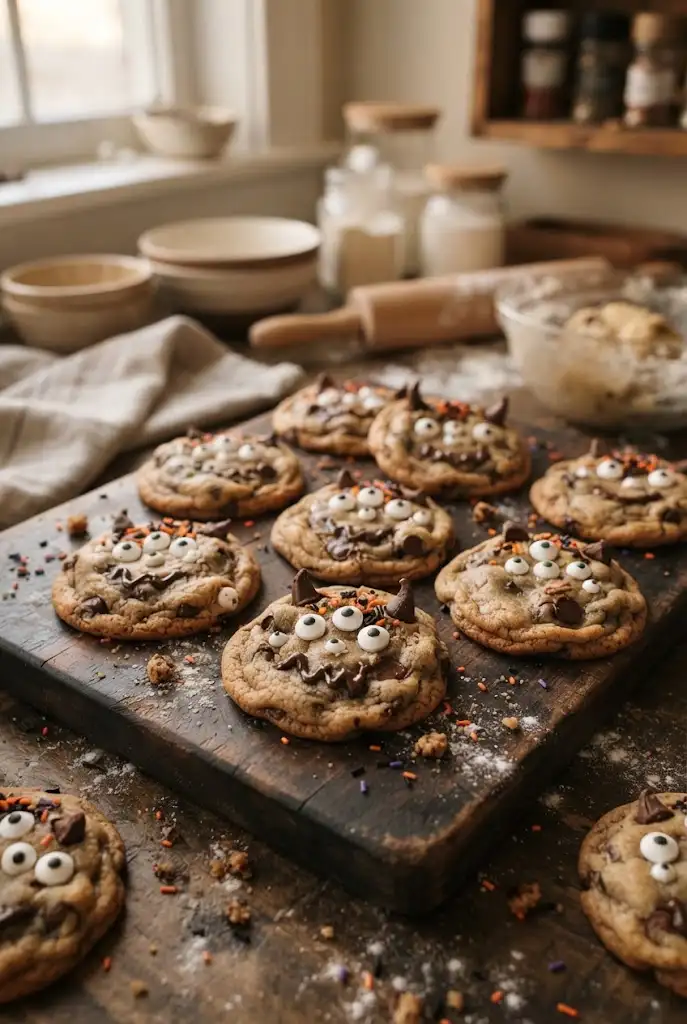
Classic chocolate chip cookies become Halloween-ready with candy eyes and a few colorful details.
Start with your favorite chocolate chip cookie dough, either homemade or refrigerated. Scoop the dough onto a parchment-lined baking sheet and bake according to the recipe or package directions. While the cookies are still warm, gently press candy eyeballs into the tops.
For a more playful monster effect, use several different sizes of candy eyes on each cookie. You can also add a few Halloween-colored sprinkles before baking. Let the cookies cool completely before arranging them on a serving platter.
Helpful Tip: Add the candy eyes immediately after baking so they stick without melting into the cookie.
Ingredients
- 1 cup unsalted butter, softened
- 1 cup granulated sugar
- 1 cup packed brown sugar
- 2 large eggs
- 2 teaspoons vanilla extract
- 3 cups all-purpose flour
- 1 teaspoon baking soda
- ½ teaspoon salt
- 2 cups chocolate chips
- ½ cup Halloween-colored sprinkles
- 1 package candy eyeballs, assorted sizes
Step 1: Prepare the Dough
Preheat your oven to 350°F (175°C). In a large bowl, beat the softened butter, granulated sugar, and brown sugar until smooth and creamy. Add the eggs one at a time, mixing well after each addition. Stir in the vanilla extract.
Step 2: Add the Dry Ingredients
In a separate bowl, whisk together the flour, baking soda, and salt. Gradually add the dry ingredients to the butter mixture and mix until just combined. Fold in the chocolate chips.
Step 3: Add Halloween Sprinkles
Gently fold some of the Halloween-colored sprinkles into the cookie dough. Avoid overmixing so the colors stay bright and distinct.
Step 4: Scoop the Cookies
Line a baking sheet with parchment paper. Scoop rounded tablespoons of dough onto the prepared sheet, leaving about 2 inches between each cookie.
Step 5: Bake the Cookies
Bake for approximately 10–12 minutes, or until the edges are lightly golden while the centers still look slightly soft.
Step 6: Add the Monster Eyes
Immediately after removing the cookies from the oven, gently press candy eyeballs into the warm tops. Use different sizes and arrange several eyes on each cookie for a fun monster effect.
Step 7: Cool and Serve
Let the cookies cool on the baking sheet for about 5 minutes, then transfer them to a wire rack. Allow them to cool completely before serving or arranging them on a Halloween platter.
Helpful Tip: Add the candy eyes while the cookies are still warm so they stick to the surface without melting completely.
Mummy Brownies
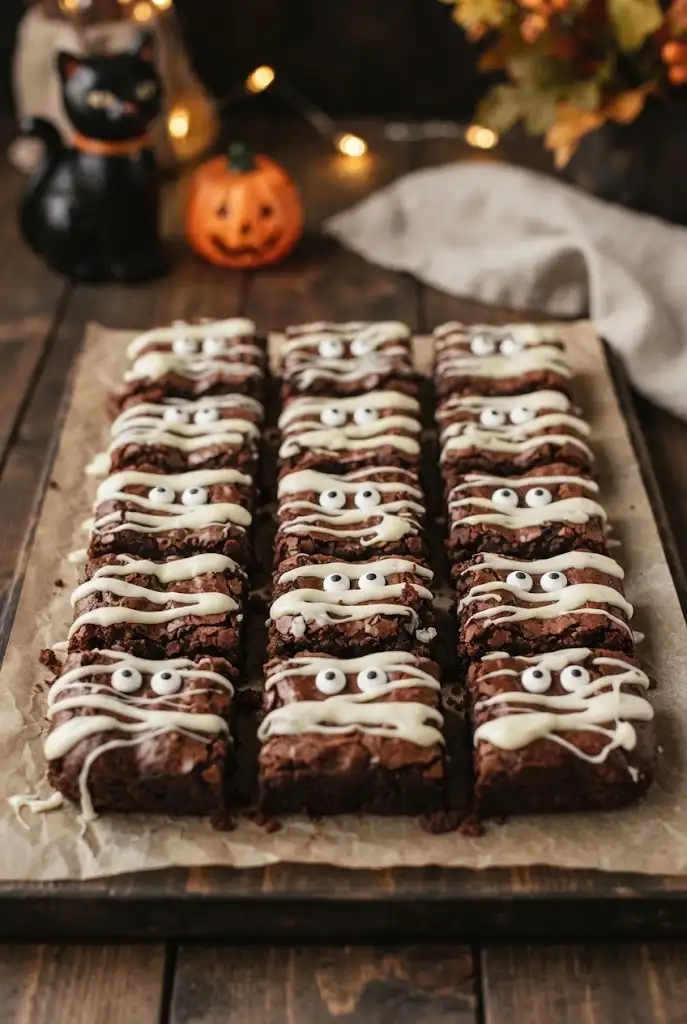
Turn ordinary brownies into adorable mummy treats with just a few simple decorations.
Bake a pan of fudgy brownies and allow them to cool completely before cutting them into squares or rectangles. Melt white chocolate or prepare a simple white icing and transfer it into a piping bag or small zip-top bag with the corner snipped off.
Pipe irregular white lines across each brownie to resemble mummy wrappings. Finish each one with two small candy eyes. The imperfect lines are part of the charm, so there’s no need for precise decorating skills.
Helpful Tip: Chill the brownies briefly before decorating if they feel too soft to handle.
Ingredients
- 1 box brownie mix, plus ingredients listed on the package or your favorite homemade brownie batter
- 1 cup white chocolate chips or melting wafers
- 1–2 tablespoons heavy cream or milk, if needed
- 24 small candy eyes
- Cooking spray or parchment paper
- Optional: ½ teaspoon vanilla extract
Step 1: Bake the Brownies
Prepare the brownie batter according to your favorite recipe or the package directions. Pour the batter into a parchment-lined baking pan and bake until the brownies are set and a toothpick inserted near the center comes out with a few moist crumbs.
Step 2: Cool Completely
Remove the brownies from the oven and allow them to cool completely in the pan. For cleaner cuts, chill the brownies in the refrigerator for about 20–30 minutes.
Step 3: Cut Into Pieces
Lift the brownies from the pan using the parchment paper. Cut them into small squares or rectangles, depending on the size you want for your mummy treats.
Step 4: Prepare the White Chocolate
Melt the white chocolate chips or melting wafers in a microwave-safe bowl in short 15–20-second intervals, stirring between each interval. Continue until smooth. If the chocolate is too thick for piping, stir in a small amount of cream or milk.
Step 5: Create the Mummy Wrappings
Transfer the melted white chocolate to a piping bag or small zip-top bag. Snip off a tiny corner and pipe irregular lines back and forth across each brownie. Leave a small area where the eyes will go.
Step 6: Add the Candy Eyes
While the white chocolate is still soft, gently place two candy eyes onto each brownie. Press them lightly so they stay in place.
Step 7: Let Them Set
Allow the decorated brownies to sit at room temperature until the chocolate hardens. You can also refrigerate them for about 10–15 minutes to speed up the process.
Helpful Tip: If the brownies feel too soft to decorate, chill them briefly before cutting and piping. Don’t worry about making perfectly straight lines—the messy, uneven mummy wrapping makes these treats more fun and spooky.
Halloween Chocolate-Covered Pretzels
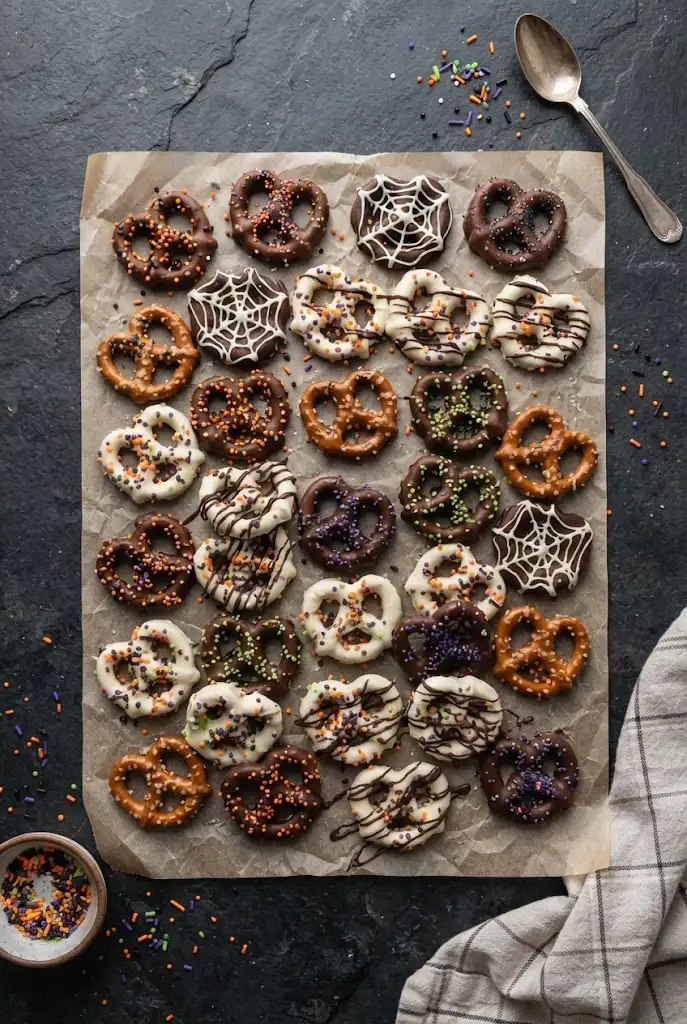
Chocolate-covered pretzels are one of the easiest Halloween treats to make because they require very little preparation.
Melt semi-sweet, milk, or white chocolate gently until smooth. Dip pretzel twists halfway into the chocolate and place them on parchment paper. Before the chocolate sets, add orange, purple, green, or black sprinkles.
For a spooky variation, drizzle white chocolate over dark chocolate pretzels to create a web-like appearance. Allow everything to set completely before transferring the pretzels to a serving bowl.
Helpful Tip: Use a microwave-safe bowl and heat chocolate in short intervals, stirring between each one.
Ingredients
- 24–30 pretzel twists
- 2 cups semi-sweet, milk, or white chocolate chips
- ½ cup Halloween-colored sprinkles
- ½ cup white chocolate melting wafers, for optional spiderweb decoration
- Orange, purple, green, and black sprinkles, as desired
- Parchment paper
Step 1: Prepare the Baking Sheet
Line a large baking sheet with parchment paper. This will prevent the chocolate-covered pretzels from sticking while they set.
Step 2: Melt the Chocolate
Place the chocolate chips in a microwave-safe bowl. Heat for 15–20 seconds at a time, stirring well after each interval. Continue until the chocolate is completely smooth and melted. Be careful not to overheat it.
Step 3: Dip the Pretzels
Hold each pretzel twist by one end and dip about half of it into the melted chocolate. Gently shake off any excess chocolate and place the pretzel on the prepared parchment-lined baking sheet.
Step 4: Add Halloween Sprinkles
While the chocolate is still wet, sprinkle the pretzels with orange, purple, green, or black Halloween sprinkles. Add enough to give each pretzel a festive look without completely covering the chocolate.
Step 5: Create a Spiderweb Design
For a spooky variation, melt the white chocolate separately. Transfer it to a small piping bag or zip-top bag with the corner snipped off. Drizzle thin lines over the dark chocolate-covered pretzels to create a simple spiderweb effect.
Step 6: Let the Chocolate Set
Allow the pretzels to sit at room temperature until the chocolate becomes firm. You can also place the tray in the refrigerator for about 15–20 minutes to speed up the process.
Step 7: Serve and Store
Once completely set, transfer the pretzels to a serving bowl or arrange them in individual Halloween treat bags. Store leftovers in an airtight container at room temperature.
Helpful Tip: Always melt chocolate in short intervals and stir between each one. Gentle heating helps prevent the chocolate from becoming thick or burnt.
Monster Marshmallow Cereal Bars
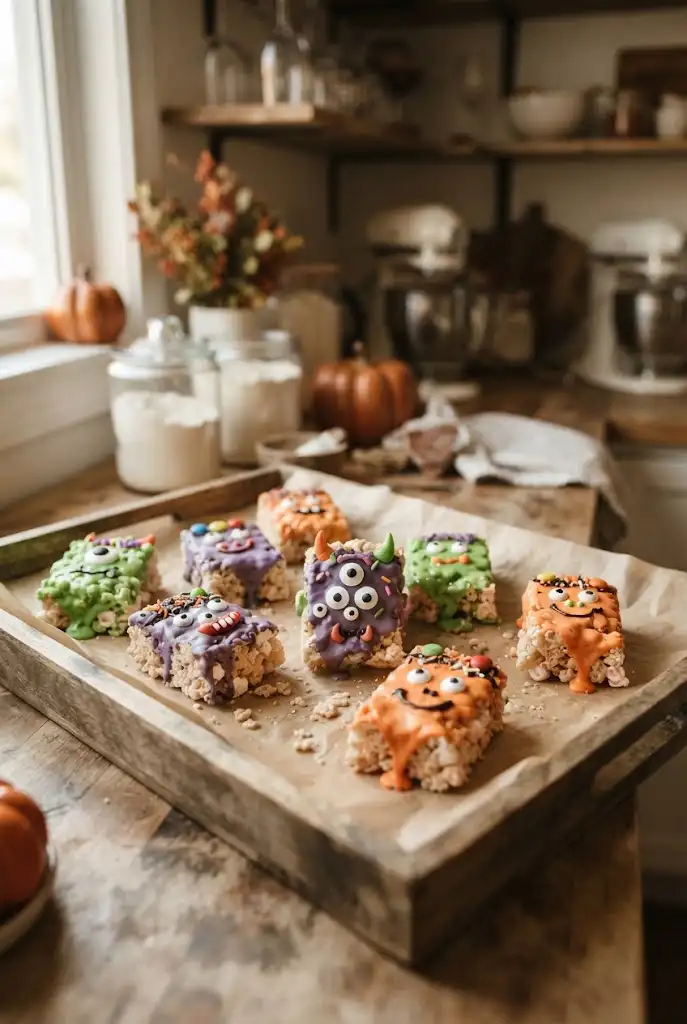
Classic crispy cereal bars can easily become colorful Halloween monsters.
Prepare a batch of marshmallow cereal treats and press the mixture into a lined pan. For a festive finish, divide melted white chocolate or candy coating into several bowls and tint portions with Halloween colors such as green, purple, or orange.
Spread or drizzle the coating over individual bars and add candy eyes while the surface is still soft. Let them set before serving.
Helpful Tip: Cutting the bars into smaller rectangles makes them easier for children to grab from a dessert table.
Ingredients
- 6 cups crispy rice cereal
- 4 cups mini marshmallows
- 4 tablespoons unsalted butter
- 1 teaspoon vanilla extract
- 2 cups white chocolate chips or candy melts
- Green, purple, and orange food coloring
- 30–40 candy eyes
- Halloween sprinkles, optional
- Nonstick cooking spray
- Parchment paper
How to Make Monster Marshmallow Cereal Bars
Step 1: Prepare the Pan
Line a 9×13-inch baking pan with parchment paper, leaving some overhang on the sides for easy removal. Lightly spray the parchment paper with nonstick cooking spray.
Step 2: Melt the Butter and Marshmallows
Melt the butter in a large saucepan over low heat. Add the mini marshmallows and stir continuously until they are completely melted and smooth. Remove from the heat and stir in the vanilla extract.
Step 3: Add the Cereal
Pour the crispy rice cereal into the melted marshmallow mixture. Gently stir until all of the cereal is evenly coated.
Step 4: Press Into the Pan
Transfer the mixture to the prepared pan. Lightly grease your hands or a spatula and gently press the mixture into an even layer. Avoid pressing too firmly, as this can make the bars hard.
Step 5: Cut Into Bars
Allow the cereal mixture to cool and firm up for about 20–30 minutes. Lift it from the pan using the parchment paper and cut it into small rectangles.
Step 6: Prepare the Colored Coating
Melt the white chocolate or candy melts according to the package directions. Divide the melted coating between several small bowls and tint each portion green, purple, or orange with food coloring.
Step 7: Decorate the Monsters
Spread or drizzle the colored coating over each cereal bar. While the coating is still soft, place two or more candy eyes on each bar. Add Halloween sprinkles for extra color if desired.
Step 8: Let Them Set
Place the decorated bars on parchment paper and allow them to sit until the coating is completely firm. You can refrigerate them for about 10–15 minutes to speed up the process.
Step 9: Serve
Arrange the monster cereal bars on a Halloween dessert table or place them individually in small treat bags. Their bright colors and silly eyes make them a fun grab-and-go dessert.
Spooky Oreo Bat Cookies
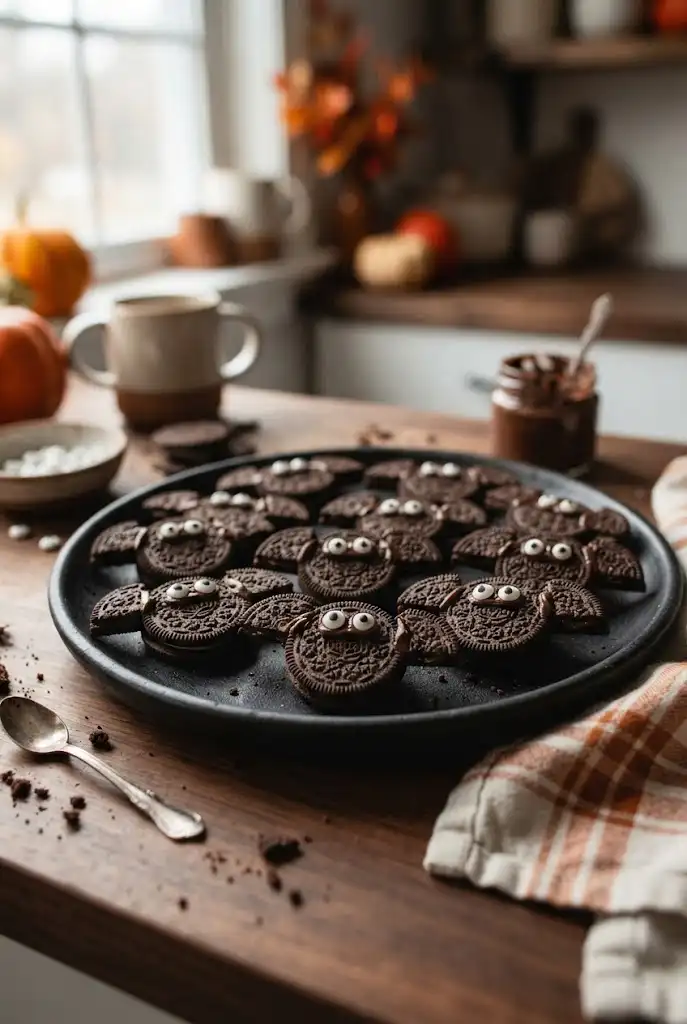
Chocolate sandwich cookies make a surprisingly simple base for Halloween bat treats.
Separate a few chocolate sandwich cookies and carefully break the chocolate cookie halves into wing-like pieces. Attach them to whole cookies using a small amount of melted chocolate or frosting. Add candy eyes to complete the bat faces.
These treats require no baking, making them especially convenient when you already have several dishes to prepare.
Helpful Tip: Assemble the bats on parchment paper and refrigerate them briefly so the chocolate sets firmly.
Ingredients
- 24 chocolate sandwich cookies, such as Oreo-style cookies
- 6–8 additional chocolate sandwich cookies for making the wings
- ½ cup chocolate chips or chocolate melting wafers
- 24–48 small candy eyes
- 2 tablespoons chocolate frosting, optional
- Halloween sprinkles, optional
- Parchment paper
How to Make Spooky Oreo Bat Cookies
Step 1: Prepare the Cookie Wings
Carefully twist apart several chocolate sandwich cookies. Separate the chocolate cookie halves from the cream filling. Using a sharp knife, gently break or cut each chocolate cookie half into two wing-like pieces.
Step 2: Melt the Chocolate
Place the chocolate chips or melting wafers in a microwave-safe bowl. Heat in 15–20-second intervals, stirring between each interval, until smooth.
Step 3: Prepare the Whole Cookies
Place the whole chocolate sandwich cookies on a parchment-lined baking sheet. These will form the bodies and faces of the bats.
Step 4: Attach the Wings
Add a small amount of melted chocolate or chocolate frosting to the sides of each whole cookie. Carefully attach one cookie wing piece to each side, creating a bat shape.
Step 5: Add the Eyes
While the chocolate is still soft, gently press two small candy eyes onto the front of each cookie. For extra personality, use different-sized eyes or slightly tilt them.
Step 6: Add Optional Decorations
If desired, drizzle a little melted chocolate over the wings or add a few Halloween sprinkles for additional decoration.
Step 7: Refrigerate the Bats
Place the finished bat cookies in the refrigerator for about 10–15 minutes, or until the chocolate has completely set and the wings feel secure.
Step 8: Serve
Transfer the spooky Oreo bat cookies to a serving platter or place them in individual Halloween treat bags. Serve immediately or store them in an airtight container.
Helpful Tip: Assemble the bats on parchment paper and refrigerate them briefly so the chocolate sets firmly and keeps the wings securely attached.
Halloween Popcorn Mix

A bowl of sweet-and-salty Halloween popcorn can double as a snack and dessert.
Start with freshly popped popcorn and spread it over a large baking sheet. Add pretzels, chocolate candies, candy corn, and Halloween-colored sprinkles. Drizzle melted white or dark chocolate across the mixture, then allow it to set.
Break the mixture into smaller pieces and serve it in individual cups or one large bowl.
Helpful Tip: Let the chocolate harden completely before storing the mix so the ingredients don’t clump together.
Ingredients
- 8 cups freshly popped popcorn
- 2 cups mini pretzels
- 1 cup candy corn
- 1 cup chocolate candies
- ½ cup Halloween-colored sprinkles
- 1 cup white chocolate chips or melting wafers
- ½ cup dark or semi-sweet chocolate chips, optional
- 1 tablespoon vegetable shortening, optional, if needed for smoother melted chocolate
How to Make Halloween Popcorn Mix
Step 1: Prepare the Popcorn
Pop the popcorn and remove any unpopped kernels. Spread the popcorn evenly over a large parchment-lined baking sheet.
Step 2: Add the Mix-Ins
Scatter the mini pretzels, candy corn, chocolate candies, and Halloween-colored sprinkles evenly over the popcorn.
Step 3: Melt the Chocolate
Place the white chocolate in a microwave-safe bowl and heat it in 15–20-second intervals, stirring after each interval until smooth. Repeat with the dark chocolate if using.
Step 4: Drizzle the Chocolate
Use a spoon, piping bag, or zip-top bag with a small corner cut off to drizzle the melted chocolate over the popcorn mixture. Try to spread the chocolate evenly without completely covering the ingredients.
Step 5: Add Extra Sprinkles
While the chocolate is still melted, sprinkle a little more Halloween-colored sprinkles over the top. This helps the sprinkles stick to the chocolate.
Step 6: Let the Mix Set
Allow the popcorn mixture to sit at room temperature until the chocolate has completely hardened. You can also refrigerate it for about 15–20 minutes to speed up the process.
Step 7: Break Into Pieces
Once the chocolate is firm, gently break the popcorn mixture into smaller bite-sized pieces.
Step 8: Serve and Store
Serve the Halloween popcorn mix in a large bowl, individual cups, or small treat bags. Store leftovers in an airtight container at room temperature.
Helpful Tip: Let the chocolate harden completely before storing the mix. This helps prevent the popcorn, pretzels, and candy from sticking together and becoming one large clump.
Ghost Chocolate-Covered Strawberries
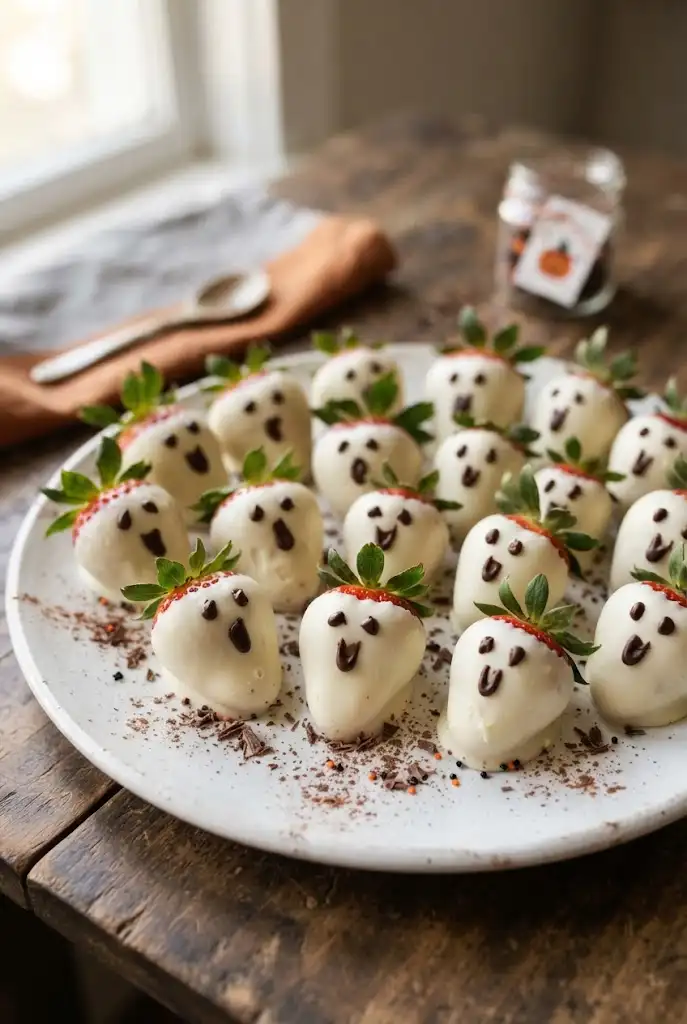
Chocolate-covered strawberries can become elegant little ghosts with a few simple details.
Dip fresh strawberries into melted white chocolate and place them on parchment paper. Once the coating has partially set, add two small chocolate dots for eyes and another dot or short line for the mouth.
Keep the strawberries chilled until serving. Their bright white coating against the red fruit creates a fun Halloween contrast.
Helpful Tip: Make sure the strawberries are completely dry before dipping so the chocolate adheres properly.
Ingredients
- 1 pound fresh strawberries
- 2 cups white chocolate chips or white melting wafers
- ½ cup semi-sweet or dark chocolate chips
- 1 teaspoon coconut oil, optional
- Parchment paper
- Toothpicks or a small piping bag
How to Make Ghost Chocolate-Covered Strawberries
Step 1: Wash and Dry the Strawberries
Gently wash the strawberries and pat them completely dry with paper towels. Allow them to air-dry for a few minutes as well. Any moisture left on the fruit can prevent the chocolate from sticking properly.
Step 2: Prepare the Baking Sheet
Line a baking sheet or large plate with parchment paper. Set it aside for the dipped strawberries.
Step 3: Melt the White Chocolate
Place the white chocolate in a microwave-safe bowl. Heat it in 15–20-second intervals, stirring well after each interval, until completely smooth. If needed, stir in a small amount of coconut oil to make the chocolate easier to dip.
Step 4: Dip the Strawberries
Hold each strawberry by its green stem and dip it into the melted white chocolate, coating most of the fruit. Allow the excess chocolate to drip back into the bowl.
Step 5: Create the Ghost Shape
Place each dipped strawberry onto the parchment paper. Let some of the white chocolate collect around the bottom of the strawberry to create a simple ghost-like shape.
Step 6: Melt the Dark Chocolate
Melt the semi-sweet or dark chocolate in a clean microwave-safe bowl using short intervals. Stir until smooth, then transfer it to a small piping bag or zip-top bag with a tiny corner snipped off.
Step 7: Add the Ghost Face
Once the white chocolate has partially set but is still slightly soft, pipe two small dots for the eyes. Add a third dot or short curved line underneath for the mouth.
Step 8: Chill the Strawberries
Place the decorated strawberries in the refrigerator for about 15–20 minutes, or until the chocolate coating is completely firm.
Step 9: Serve
Keep the ghost strawberries chilled until you are ready to serve them. Arrange them on a Halloween platter for an eye-catching dessert.
Helpful Tip: Make sure the strawberries are completely dry before dipping. Water can cause the chocolate to seize and prevent it from coating the fruit smoothly.
Pumpkin Patch Cupcakes
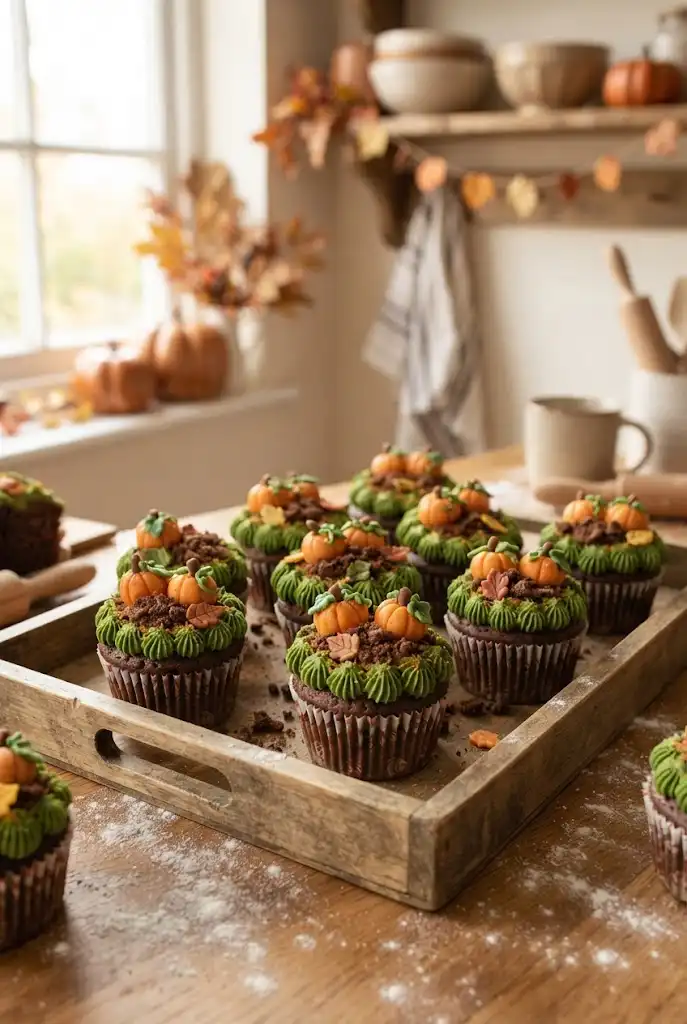
Cupcakes are easy to adapt to almost any Halloween theme, and a pumpkin patch design is especially festive.
Bake chocolate or vanilla cupcakes and let them cool completely. Frost them with green frosting for the base, then add small orange candy pumpkins or pipe simple orange pumpkin shapes on top.
For a more complete pumpkin patch appearance, sprinkle crushed chocolate cookies around the frosting to resemble dark soil.
Helpful Tip: Use a star piping tip for the green frosting to create textured grass around the pumpkins.
Ingredients
- 12 chocolate or vanilla cupcakes, baked and completely cooled
- 2 cups green buttercream frosting
- ½ cup orange frosting
- ¼ cup chocolate frosting, optional
- 12–24 small orange candy pumpkins
- 6–8 chocolate sandwich cookies, crushed
- Green food coloring, if needed
- Orange food coloring, if making homemade frosting
- Star piping tip
- Piping bags
How to Make Pumpkin Patch Cupcakes
Step 1: Bake the Cupcakes
Prepare your favorite chocolate or vanilla cupcake batter. Divide the batter between a lined muffin pan and bake according to your recipe until a toothpick inserted into the center comes out clean. Allow the cupcakes to cool completely before decorating.
Step 2: Prepare the Green Frosting
Place the green buttercream into a piping bag fitted with a star piping tip. If using plain frosting, tint it with green food coloring until you reach your desired shade.
Step 3: Create the Grass
Pipe small stars or short bursts of green frosting over the top of each cupcake. Cover most of the surface to create a textured grass-like pumpkin patch.
Step 4: Add the Chocolate Soil
Sprinkle a small amount of crushed chocolate sandwich cookies over the green frosting. The dark cookie crumbs create the appearance of rich soil between the grass.
Step 5: Add the Pumpkins
Place one or two small orange candy pumpkins on top of each cupcake. Gently press them into the frosting so they stay securely in place.
Step 6: Pipe Homemade Pumpkins
If you don’t have candy pumpkins, place orange frosting in a piping bag and pipe small pumpkin shapes onto the cupcakes. Add a tiny amount of green frosting on top for the pumpkin stems.
Step 7: Add Finishing Details
For extra decoration, add small chocolate cookie crumbs around the pumpkins or pipe a few additional green frosting stars to make the pumpkin patch look fuller.
Step 8: Serve
Arrange the finished cupcakes on a Halloween platter and serve immediately, or keep them covered until ready to enjoy.
Helpful Tip: Use a star piping tip for the green frosting. The textured frosting looks like grass and gives the pumpkin patch a more detailed appearance.
Witch Hat Cookies
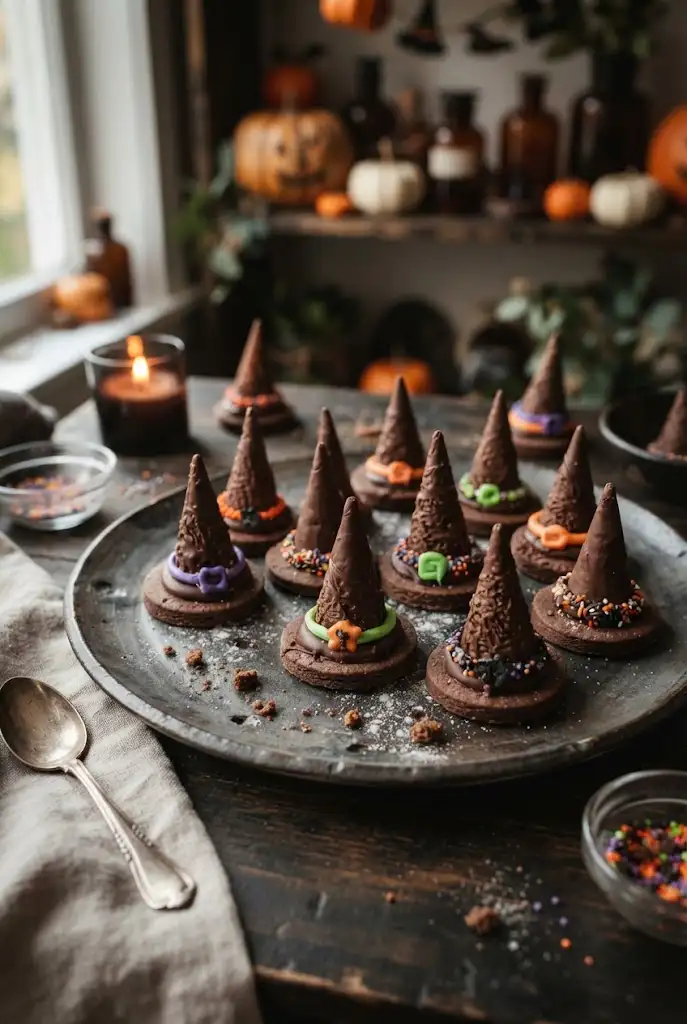
Witch hat cookies create a dramatic Halloween presentation without requiring complicated baking.
Use round cookies as the base and place a chocolate-covered cone or similar pointed candy shape on top with frosting or melted chocolate. Add a small strip of colorful candy around the base of the cone to create the witch’s hatband.
Purple, green, orange, and black decorations work especially well for the Halloween color palette.
Helpful Tip: Assemble the hats shortly before serving or chill them briefly after construction to help everything stay in place.
Ingredients
- 12 round chocolate or sugar cookies
- 12 small chocolate-covered ice cream cones or pointed chocolate cones
- ½ cup chocolate frosting or melted chocolate
- ¼ cup purple, green, orange, or black candy strips
- ¼ cup orange or purple sprinkles, optional
- ½ cup chocolate chips, optional
- 12 small candy decorations, optional
How to Make Witch Hat Cookies
Step 1: Prepare the Cookie Bases
Arrange the round cookies on a parchment-lined baking sheet or serving tray. These cookies will form the wide brim of each witch hat.
Step 2: Prepare the Chocolate Cones
If using chocolate-covered cones, make sure they are completely dry and ready to assemble. You can also dip plain cones in melted chocolate and allow them to set before decorating.
Step 3: Add the Frosting
Spread a small amount of chocolate frosting or melted chocolate in the center of each cookie. This will act as the edible glue that holds the pointed cone in place.
Step 4: Attach the Hat Tops
Carefully place one pointed chocolate cone on top of each cookie. Press it gently into the frosting so it stays upright without breaking the cookie.
Step 5: Add the Hatband
Wrap a thin strip of colorful candy around the bottom of each cone where it meets the cookie. Use purple, green, orange, or black candy to create a classic Halloween look.
Step 6: Add Extra Decorations
For more festive witch hats, add Halloween sprinkles, small candy pieces, or a little melted chocolate drizzle. You can also use contrasting colors for a more playful appearance.
Step 7: Let the Hats Set
Place the completed witch hats in the refrigerator for about 10–15 minutes. This allows the frosting or chocolate to firm up and helps keep the cone securely attached.
Step 8: Serve
Arrange the witch hat cookies on a large serving platter. They can be served as individual treats or displayed together to create a colorful Halloween centerpiece.
Helpful Tip: Assemble the witch hats shortly before serving, or chill them briefly after construction so the frosting or melted chocolate has time to set and hold everything securely.
Spiderweb Rice Krispie Treats
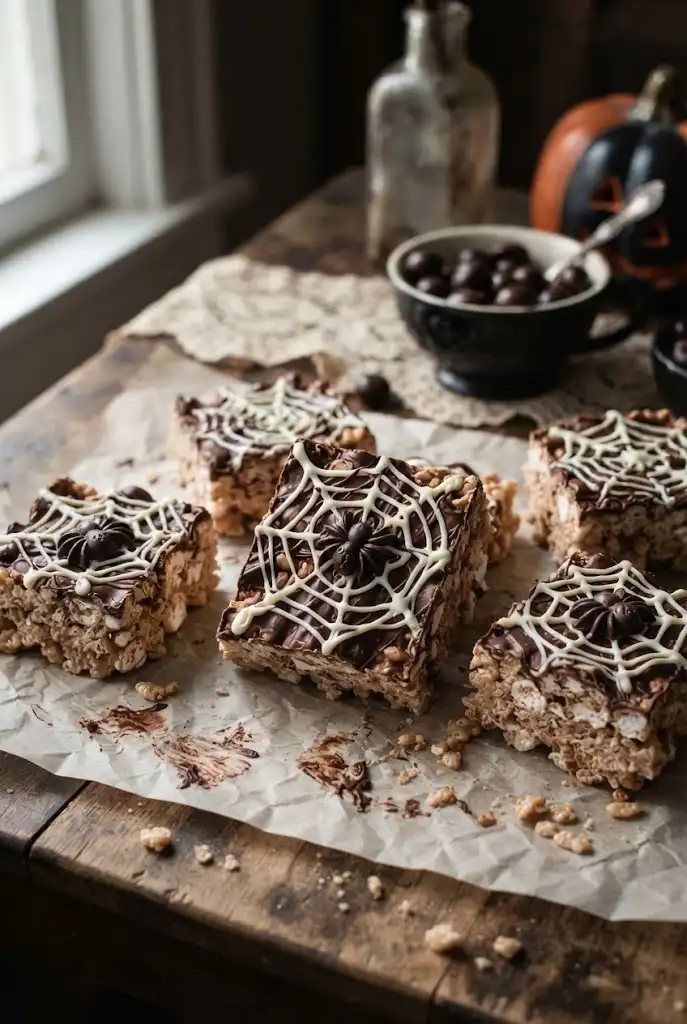
Rice cereal treats provide a simple canvas for spooky spiderweb decorations.
Cut homemade or prepared crispy cereal treats into squares. Drizzle melted white chocolate in several thin circles over the top, then drag a toothpick from the center outward at intervals to create a web effect.
Place a small chocolate candy or chocolate spider decoration in the center if desired.
Helpful Tip: Don’t worry about making every web perfectly symmetrical. Slight variations make the treats look homemade.
Ingredients
- 6 cups crispy rice cereal
- 4 cups mini marshmallows
- 4 tablespoons unsalted butter
- 1 teaspoon vanilla extract
- 1½ cups white chocolate chips or melting wafers
- ½ cup semi-sweet or dark chocolate chips
- Small chocolate candies or chocolate spider decorations, optional
- Parchment paper
- Nonstick cooking spray
How to Make Spiderweb Rice Krispie Treats
Step 1: Prepare the Pan
Line a 9×13-inch baking pan with parchment paper, leaving some overhang on the sides. Lightly coat the parchment with nonstick cooking spray.
Step 2: Melt the Marshmallows
Melt the butter in a large saucepan over low heat. Add the mini marshmallows and stir continuously until completely melted and smooth. Remove from the heat and stir in the vanilla extract.
Step 3: Add the Cereal
Pour the crispy rice cereal into the marshmallow mixture. Gently stir until the cereal is evenly coated.
Step 4: Press Into the Pan
Transfer the mixture to the prepared pan. Lightly grease your hands or a spatula and gently press the cereal mixture into an even layer. Let it cool and firm up for about 20–30 minutes.
Step 5: Cut Into Squares
Lift the cereal treat from the pan using the parchment paper. Cut it into squares or rectangles of your preferred size.
Step 6: Melt the White Chocolate
Place the white chocolate in a microwave-safe bowl. Heat in 15–20-second intervals, stirring after each interval, until smooth and easy to drizzle.
Step 7: Create the Spiderwebs
Transfer the melted white chocolate to a piping bag or zip-top bag with a small corner snipped off. Pipe several thin circles on top of each cereal treat, starting with a small circle in the center and gradually making larger circles around it.
Step 8: Form the Web Design
While the white chocolate is still soft, use a toothpick to drag lines from the center of the circles outward toward the edge. Repeat around the treat to create a spiderweb pattern.
Step 9: Add the Spider
Melt the dark chocolate and use it to attach a small chocolate candy or chocolate spider decoration to the center of each web. Let the chocolate set completely.
Step 10: Serve
Arrange the finished Spiderweb Rice Krispie Treats on a Halloween platter and serve. Store leftovers in an airtight container.
Helpful Tip: Don’t worry about making every web perfectly symmetrical. Slight variations give these treats a homemade Halloween look and make each spiderweb unique.
Graveyard Chocolate Pudding Cups

Individual pudding cups can become miniature edible graveyards with cookies and candy.
Prepare chocolate pudding and spoon it into small clear cups. Crush chocolate sandwich cookies and sprinkle them over the surface to create the appearance of soil. Add small rectangular cookies decorated like tombstones and finish with gummy worms or candy pumpkins.
These individual portions are convenient for parties because guests can grab one without needing to cut or serve a large dessert.
Helpful Tip: Assemble the cups a few hours before serving and keep them refrigerated.
Ingredients
- 4 cups prepared chocolate pudding
- 12 small clear plastic or glass dessert cups
- 12–15 chocolate sandwich cookies, crushed
- 12 small rectangular cookies for tombstones
- ½ cup gummy worms
- ¼ cup candy pumpkins
- ½ cup melted white or dark chocolate, optional
- 2 tablespoons chocolate frosting, optional
- Green sprinkles, optional
How to Make Graveyard Chocolate Pudding Cups
Step 1: Prepare the Chocolate Pudding
Prepare your favorite chocolate pudding according to the recipe or package directions. Allow it to cool slightly before assembling the dessert cups.
Step 2: Fill the Cups
Spoon the chocolate pudding evenly into small clear cups. Leave a little room at the top for the cookie crumbs and decorations.
Step 3: Create the Cookie Soil
Place the chocolate sandwich cookies in a food processor and pulse until they resemble fine crumbs. You can also place them in a sealed bag and crush them with a rolling pin.
Step 4: Add the Dirt
Sprinkle a generous layer of crushed chocolate cookies over the top of each pudding cup. Gently spread the crumbs across the surface to create the appearance of dark graveyard soil.
Step 5: Make the Tombstones
Use small rectangular cookies as edible tombstones. If desired, melt a little white chocolate and transfer it to a small piping bag. Write simple designs such as “RIP” or draw cracks on the cookies.
Step 6: Add the Tombstones
Carefully press one decorated cookie into the crushed cookie layer of each pudding cup. Position it slightly toward the back or side for a realistic miniature graveyard effect.
Step 7: Add Spooky Decorations
Place a gummy worm partially into the cookie crumbs and add a small candy pumpkin beside the tombstone. Green sprinkles can also be scattered around the surface to resemble grass.
Step 8: Chill the Pudding Cups
Cover the cups loosely and refrigerate them for at least 1–2 hours before serving. This allows the pudding to become fully chilled and keeps the decorations fresh.
Step 9: Serve
Serve the individual graveyard pudding cups directly from the refrigerator. Their individual portions make them especially convenient for Halloween parties and dessert tables.
Helpful Tip: Assemble the cups a few hours before serving and keep them refrigerated. Add delicate decorations such as gummy worms shortly before serving if you want them to look extra fresh.
Halloween Monster Donuts

Plain glazed or chocolate donuts can be transformed into silly monsters with colorful icing and candy eyes.
Use store-bought donuts when you’re short on time or make homemade donuts if you prefer to bake. Dip the tops in tinted icing and add candy eyes before the icing sets.
Different eye sizes and icing colors give each donut its own personality. Arrange several varieties together for a colorful Halloween dessert display.
Helpful Tip: Put the candy eyes on while the icing is still tacky so they stay securely attached.
Ingredients
- 6–8 plain glazed or chocolate donuts
- 1½ cups powdered sugar
- 2–3 tablespoons milk
- ½ teaspoon vanilla extract
- Food coloring in Halloween colors such as green, purple, orange, and blue
- 24–32 candy eyes in different sizes
- ¼ cup chocolate chips or melted chocolate
- Halloween sprinkles, optional
- Mini candy pieces or colorful candies, optional
How to Make Halloween Monster Donuts
- Prepare the icing: In a bowl, whisk together the powdered sugar, milk, and vanilla extract until smooth. Add a little more milk if the icing is too thick.
- Add the colors: Divide the icing between several small bowls. Tint each bowl with a different food coloring to create colorful monster faces.
- Dip the donuts: Hold each donut and dip the top into the colored icing. Gently lift it and allow the excess icing to drip back into the bowl.
- Add the monster eyes: While the icing is still tacky, immediately place candy eyes over the surface. Use different sizes and positions to give each monster a unique expression.
- Create extra details: Use melted chocolate to draw mouths, eyebrows, or other silly facial expressions. Add sprinkles or small candies for additional decoration.
- Let them set: Place the decorated donuts on a tray and allow the icing to set for about 15–20 minutes before serving.
Caramel Apple Slices
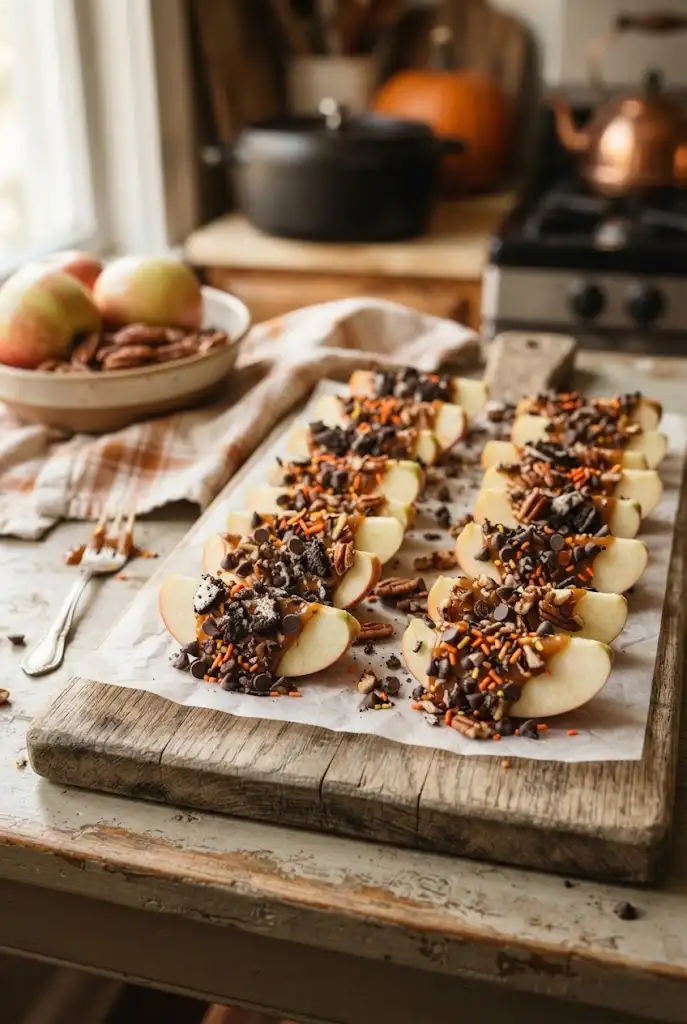
Caramel apples are a Halloween classic, but sliced versions are easier to serve at a party.
Cut crisp apples into thick wedges and pat them dry. Dip or drizzle the slices with melted caramel, then add toppings such as chopped nuts, mini chocolate chips, crushed cookies, or Halloween sprinkles.
Arrange them on parchment or a serving platter and chill briefly before serving.
Helpful Tip: A quick brush of lemon juice can help slow browning if you’re preparing the apple slices ahead of time.
Ingredients
- 3–4 crisp apples, such as Granny Smith or Honeycrisp
- 1 cup soft caramel candies
- 2 tablespoons heavy cream or milk
- ½ cup mini chocolate chips
- ½ cup chopped peanuts or pecans
- ½ cup crushed chocolate sandwich cookies
- ¼ cup Halloween sprinkles
- 1 tablespoon lemon juice
- Parchment paper
How to Make Caramel Apple Slices
- Prepare the apples: Wash and dry the apples thoroughly. Cut them into thick wedges and remove the seeds and cores.
- Prevent browning: Lightly brush the apple slices with lemon juice, especially if you are preparing them ahead of time. Pat the slices dry with a paper towel so the caramel sticks properly.
- Melt the caramel: Place the caramel candies and heavy cream in a microwave-safe bowl. Microwave in 20–30 second intervals, stirring between each interval, until the caramel is smooth and easy to drizzle.
- Add the caramel: Dip each apple slice halfway into the melted caramel or drizzle caramel generously over the slices.
- Add toppings: Immediately sprinkle the caramel-covered apples with mini chocolate chips, chopped nuts, crushed cookies, or Halloween sprinkles.
- Chill the slices: Arrange the finished apple slices on a parchment-lined tray. Refrigerate them for about 15–20 minutes, or until the caramel becomes firm.
- Serve: Transfer the chilled caramel apple slices to a serving platter and enjoy them while fresh.
Candy Corn Fudge
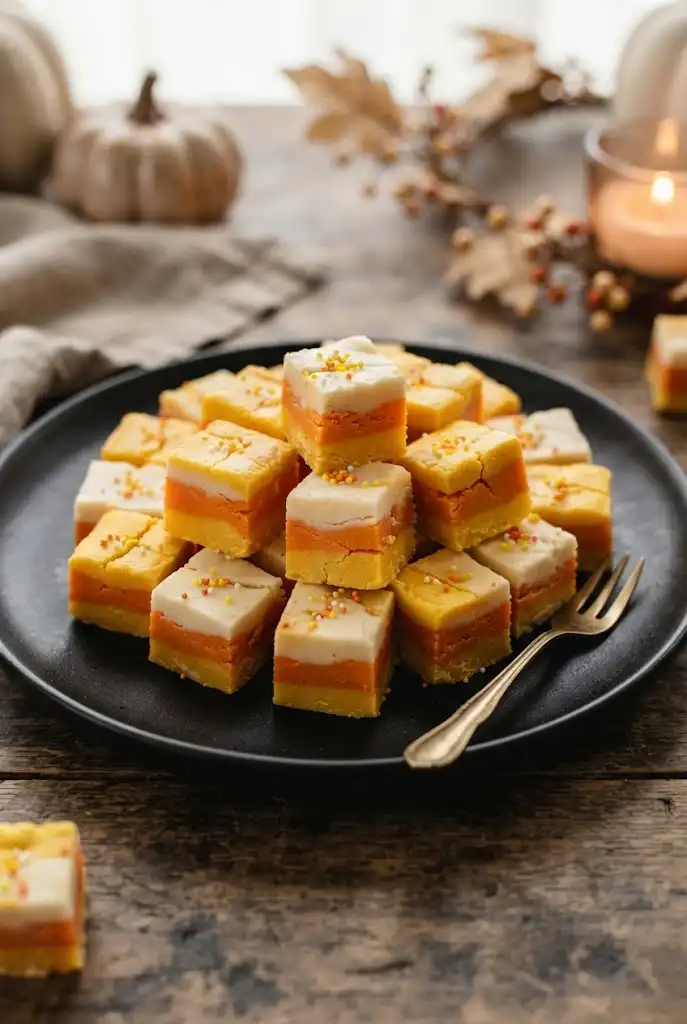
Candy corn fudge brings classic Halloween colors to the dessert table in a creamy layered treat.
Prepare a simple white fudge mixture and divide it into portions. Tint portions orange and yellow while leaving another portion white. Layer the colors in a lined pan, allowing each layer to firm enough to support the next.
Once completely set, cut the fudge into small squares or triangles.
Helpful Tip: Use a sharp knife warmed under hot water and dried thoroughly to create cleaner cuts.
Ingredients
- 3 cups white chocolate chips
- 1 can (14 ounces) sweetened condensed milk
- 2 tablespoons unsalted butter
- 1 teaspoon vanilla extract
- Orange food coloring
- Yellow food coloring
- Pinch of salt
- Cooking spray or parchment paper
How to Make Candy Corn Fudge
- Prepare the pan: Line an 8-inch square baking pan with parchment paper, leaving some paper hanging over the sides for easy removal.
- Make the fudge mixture: Add the white chocolate chips, sweetened condensed milk, butter, and salt to a saucepan. Heat over low heat, stirring constantly until the chocolate is completely melted and the mixture is smooth.
- Add vanilla: Remove the mixture from the heat and stir in the vanilla extract.
- Divide the mixture: Quickly divide the fudge mixture into three portions. Leave one portion white, tint one portion yellow, and tint the remaining portion orange.
- Create the layers: Spread the yellow fudge evenly across the bottom of the prepared pan. Let it cool for several minutes until slightly firm. Add the orange layer on top, followed by the white layer.
- Chill the fudge: Refrigerate the layered fudge for at least 2–3 hours, or until completely firm.
- Cut into pieces: Lift the fudge from the pan using the parchment paper. Cut it into small squares or triangles using a sharp knife.
Easy Halloween Chocolate Bark
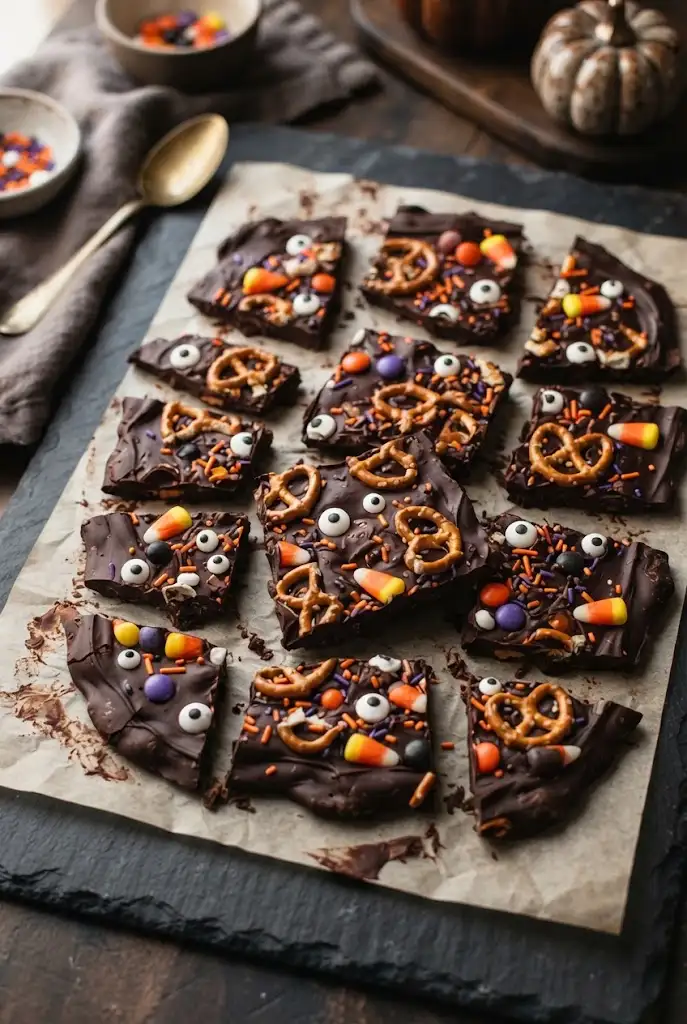
Chocolate bark is one of the simplest desserts for a busy Halloween party because it can be customized with almost anything.
Spread melted dark or milk chocolate onto parchment paper in an even layer. While it’s still soft, add pretzels, candy eyes, chopped chocolate pieces, Halloween sprinkles, candy corn, or small candies.
Let the bark harden completely, then break it into irregular pieces. The naturally uneven shapes make it look festive and homemade.
Helpful Tip: Keep the toppings balanced so the chocolate remains visible and the finished bark is easy to break into pieces.
Ingredients
- 12 ounces dark, milk, or semi-sweet chocolate
- ½ cup mini pretzels
- ¼ cup candy eyes
- ¼ cup candy corn
- ¼ cup Halloween sprinkles
- ¼ cup mini chocolate candies or chopped chocolate pieces
- 2 tablespoons colorful Halloween candies, optional
- Parchment paper
How to Make Easy Halloween Chocolate Bark
- Prepare the baking sheet: Line a large baking sheet with parchment paper and set it aside.
- Melt the chocolate: Break the chocolate into small pieces and place it in a microwave-safe bowl. Heat in 20–30 second intervals, stirring after each interval, until completely smooth and melted.
- Spread the chocolate: Pour the melted chocolate onto the parchment-lined baking sheet. Use a spatula to spread it into an even layer about ¼-inch thick.
- Add the toppings: While the chocolate is still soft, scatter the pretzels, candy eyes, candy corn, Halloween sprinkles, and chopped chocolate pieces over the surface. Gently press larger toppings into the chocolate so they stay in place.
- Let it set: Place the tray in the refrigerator for about 30–45 minutes, or until the chocolate has hardened completely.
- Break into pieces: Remove the chocolate bark from the parchment paper and break it into irregular pieces with your hands. You can also use a knife if you prefer more uniform pieces.
- Serve: Arrange the Halloween chocolate bark on a serving platter or place individual pieces into small treat bags for party favors.
Helpful Tip: Keep the toppings balanced so the chocolate remains visible and the finished bark is easy to break into pieces. For an especially colorful Halloween look, combine candy eyes, orange and purple sprinkles, and candy corn.